AWSは、非常に便利で信頼性の高い組み込み機能を備えたクラウドおよびサーバーエコシステムです。現在利用中のオンプレミスにあるサーバーをAWSクラウドサーバーに移行する需要は年を追うごとに高くなります。この記事では、CloudEndureMigrationを使用してサーバーをAWSクラウドに移行する手順について説明します。
CloudEndure Migrationとは
- CloudEndure Migrationは、AWSと統合して、ユーザーがサーバーデータを他の場所からAWSに転送できるようにするソフトウェアソリューションです。
- CloudEndureに転送するコストは、AWSで転送されたEC2サーバーのコストと、NatGatewayのコストの一部のみです。 (サーバー転送中に使用されるネットワーク帯域幅)
- 特にデータを転送する場合、サーバーは正常に動作して、ダウンタイムが非常に短いです。
- Server Repication(中間)デフォルトの構成と通常のネットワーク帯域幅条件ではデータの100GBが約2時間で転送されます。
CloudEndureの使用の仕方について
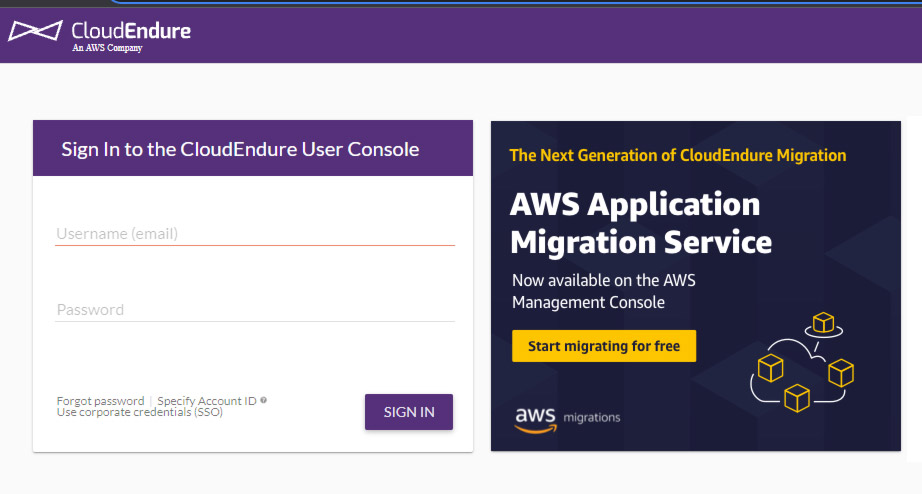
Step1: CloudEndureのhttps://console.cloudendure.com/#/signInにアクセス。
このページから、ユーザーアカウントに登録するか、既存のアカウントでログインできます。
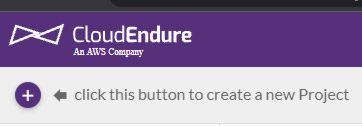
Step 2: アカウントにアクセスした後、ナビゲーションバーで[+]アイコンを選択して新しいプロジェクトを作成します。
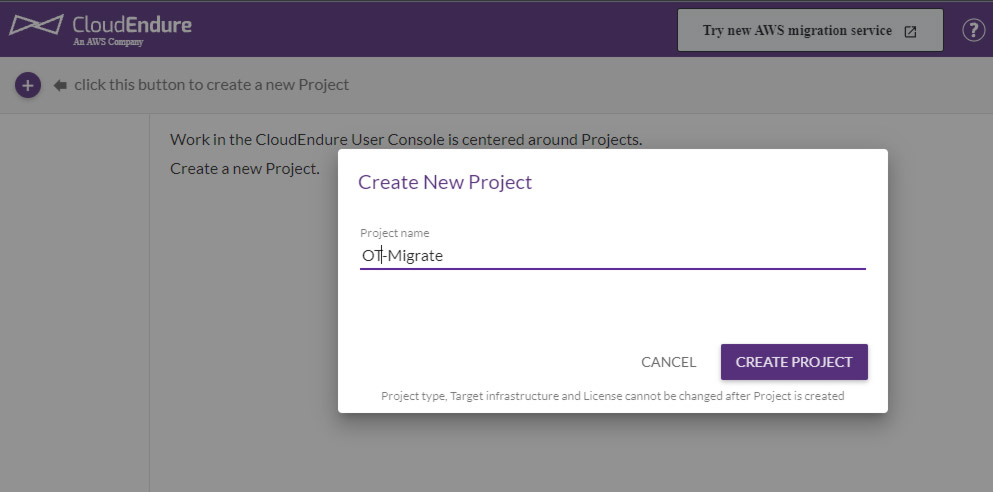
作成するプロジェクト名を入力し、[CREATE PROJECT]をクリックします。
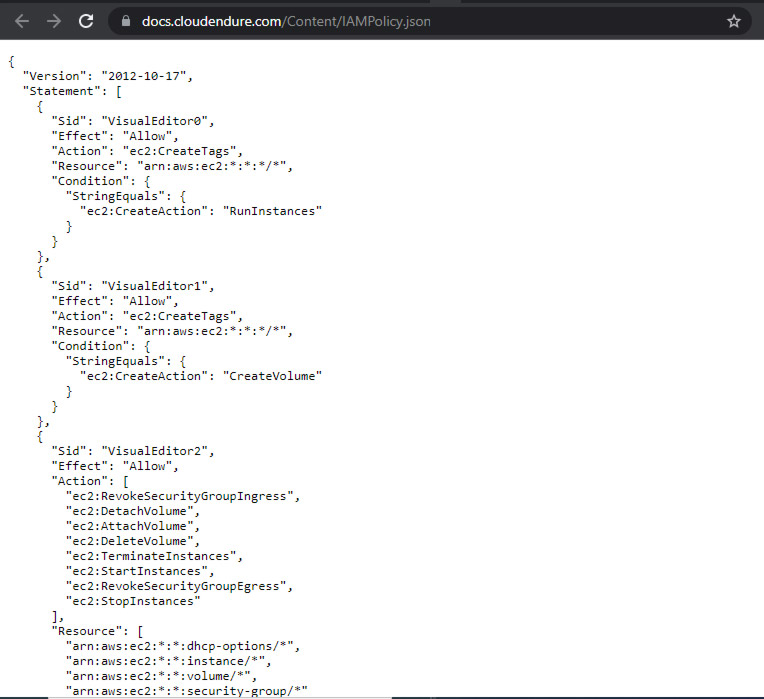
Step3: プロジェクトを作成した後、AWSCREDENTIALS画面に次の手順が表示されます。 これらの「The Project must have these permissions」の中「these permissions」リンクをクリックします。
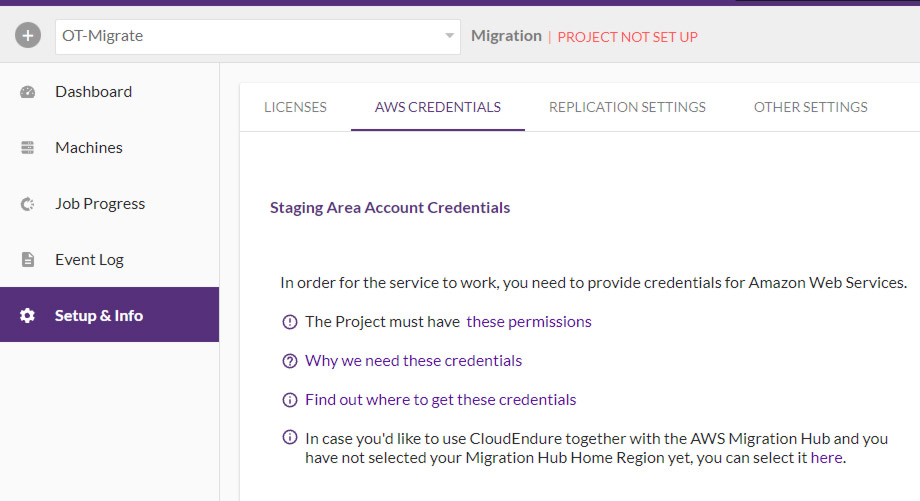
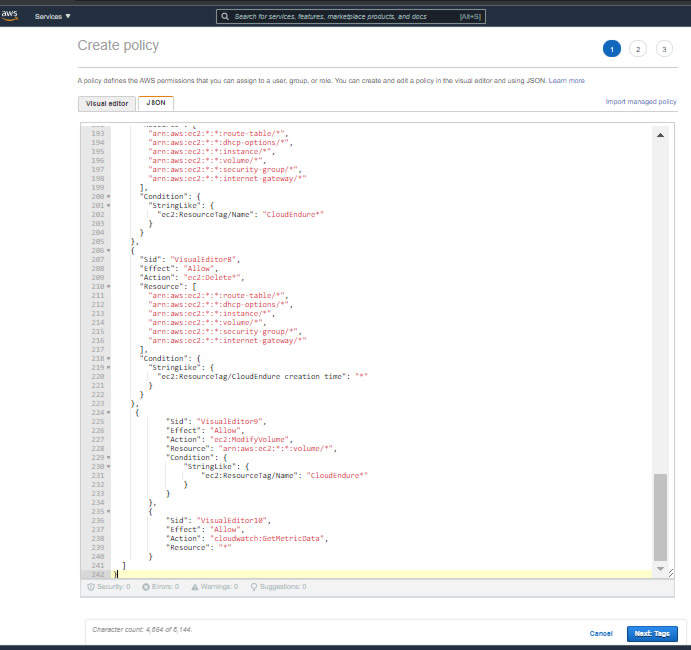
「The Project must have these permissions」の中「these permissions」リンクをクリックした後、jsonコードのページにリンクされます。 このコードを保存します。
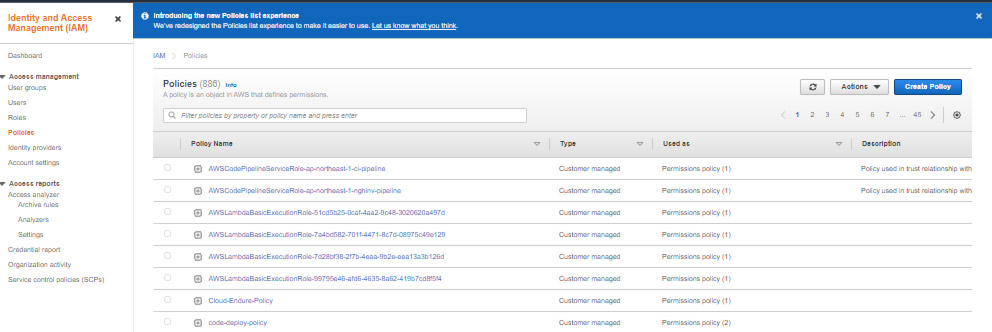
Step 4 :AWSアカウントにログインすると、AWS Management Consoleが表示されます。Services メニューにIAMを検索してIAMページにアクセスします。
IAMページで、マウスポインターで移動して、[Policies]および[Create Policy]をクリックします。
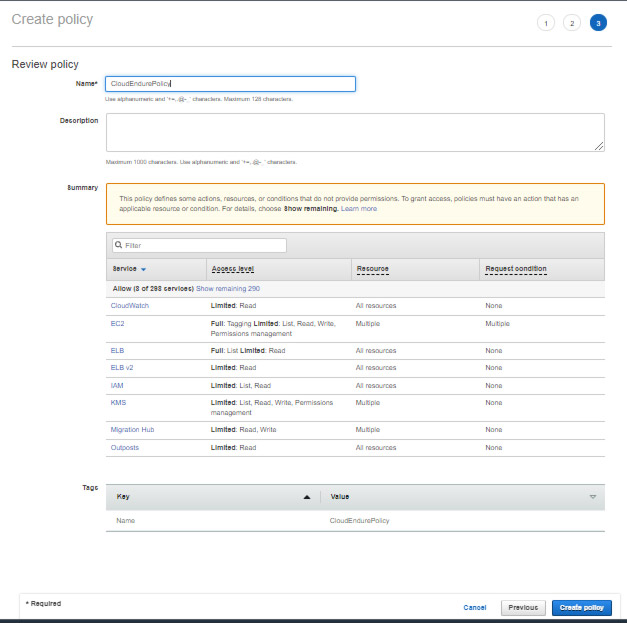
[Create Policy]ページで、[JSON]タブを選択し、前の手順でJSONコードを貼り付けます。 [Next: Tags]をクリックします。
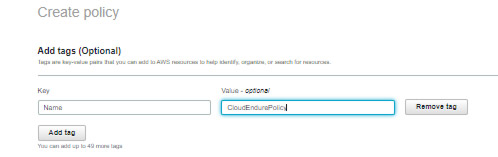
タグ名とポリシー名を追加し、[Create policy]をクリックして作成します。
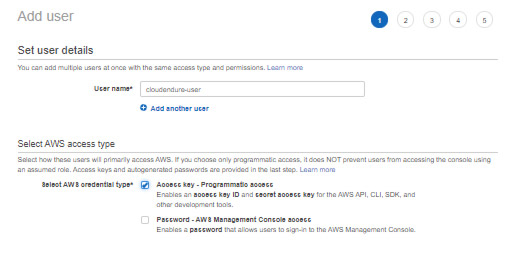
ポリシーを作成した後、IAM画面で引き続き[Users]と[Add User]を選択します。

ユーザー名を入力してユーザータイプを選択し、[Next]をクリックします。
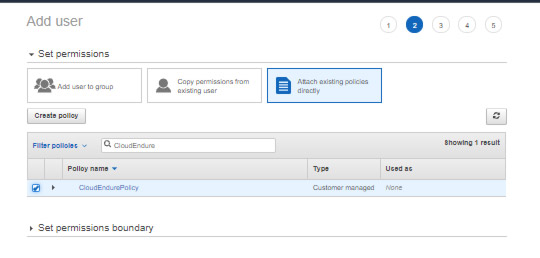
ユーザーのpermission ページで、「Attach existing policies directly」タブを選択し、作成した「CloudEndurePolicy」を確認します。 [Next]をクリックします。
Tag name, reviewを入力し「create user」ボタンをくりっくします。
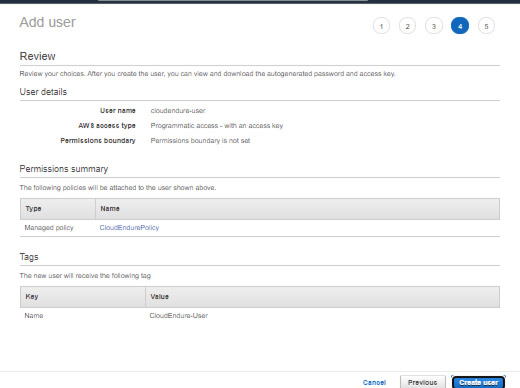
ユーザーを作成した後、AWSはAccess Key IDとSecret Access Keyの情報を表示します。 これらの2つの重要な情報を保存します。
Step 5:Step3で作成したCloudEndureプロジェクトに戻ります。Step4で保存したAccess Key IDとSecret Access Keyの情報をAWS CREDENTIALSセクションに入力します。
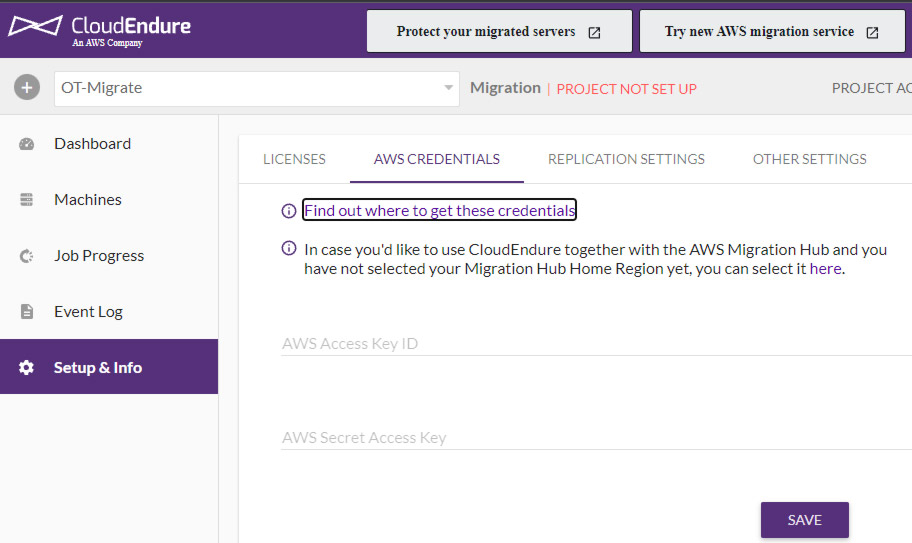
キーを入力してSAVEを押すと、CloudEndureは「Replication Setting」タブに切り替わります。
このタブでは、他のプロバイダーからAWSにデータを転送するために作成された中間サーバーを設定します。
この中間サーバーは、AWSのEC2でも初期化されます。
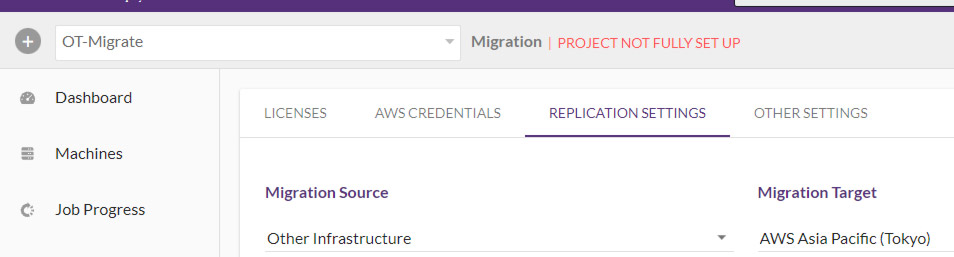
[Replication Setting]画面の[Migration Source]セクションで、[Other Infra]を選択します。
Migration Targetは、新しく転送されたサーバーをAWSのどこに配置するかを選択します。 こちらは東京を選択します。
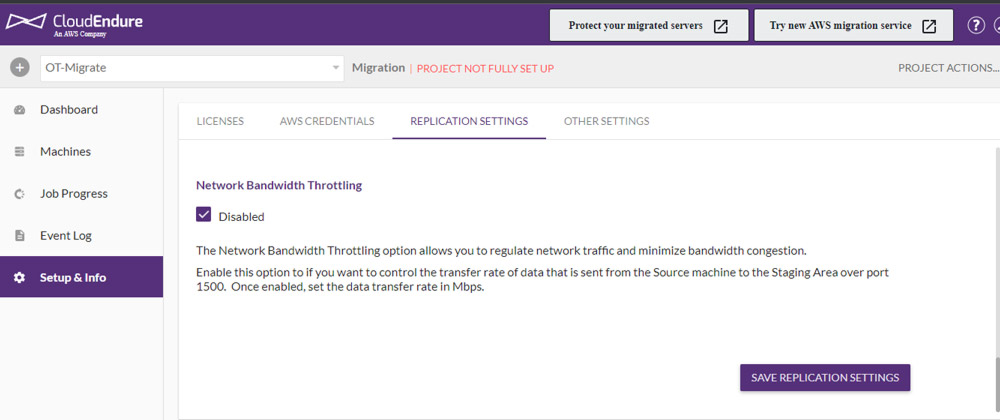
・[Replication Setting]画面の[Replication Servers]セクションで、データの転送先となる中間サーバーの適切な構成を選択します。
構成が強力であるほど、データ転送速度が速くなることです。
このラボでは、デフォルト構成のままにして、[Save Replication Setting]を選択します。
・Replication Serverの構成が完了すると、CloudEndure画面に切り替わり、転送するサーバーへのCloudEndureAgentのインストールを案内します。
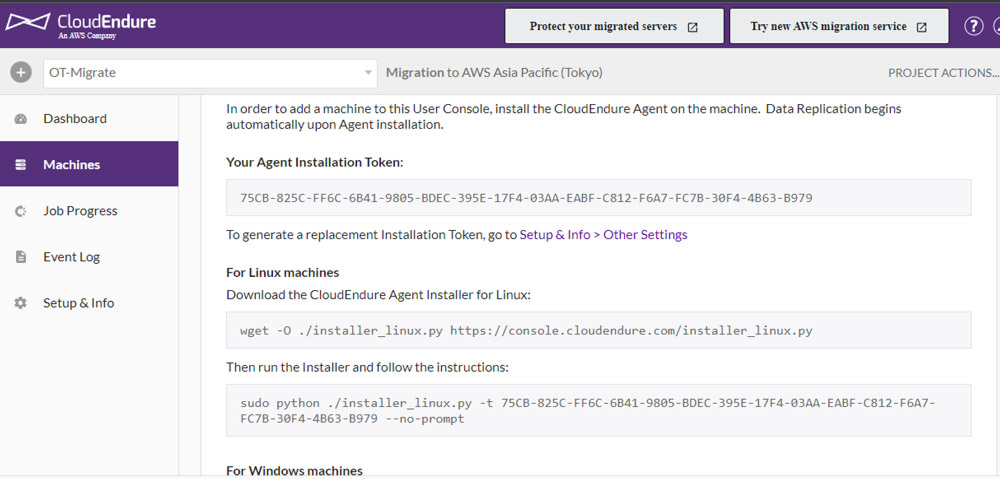
Step 6:上記のCloudEndureの手順に従い、転送するサーバーにアクセスします。 このラボでは、Linuxサーバーにインストールします。
・Linuxサーバーにアクセスし、次のコマンドを使用してCloudEndureインストールファイルをダウンロードします。
wget -O ./installer_linux.py https://console.cloudendure.com/installer_linux.py
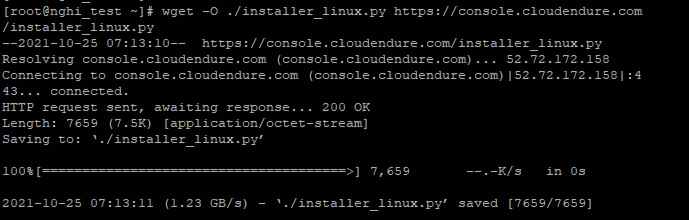
ダウンロードしたCloudEndureをインストールするには、次のコマンドを使用します。
sudo python ./installer_linux.py -t 75CB-825C-FF6C-6B41-9805-BDEC-395E-17F4-03AA-EABF-C812-F6A7-FC7B-30F4-4B63-B979 --no-prompt
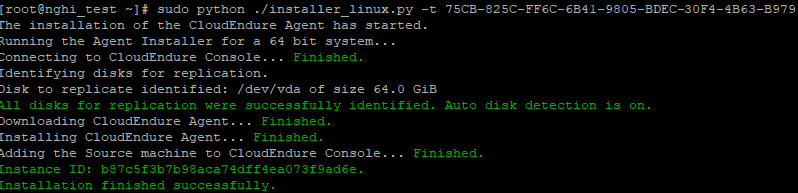
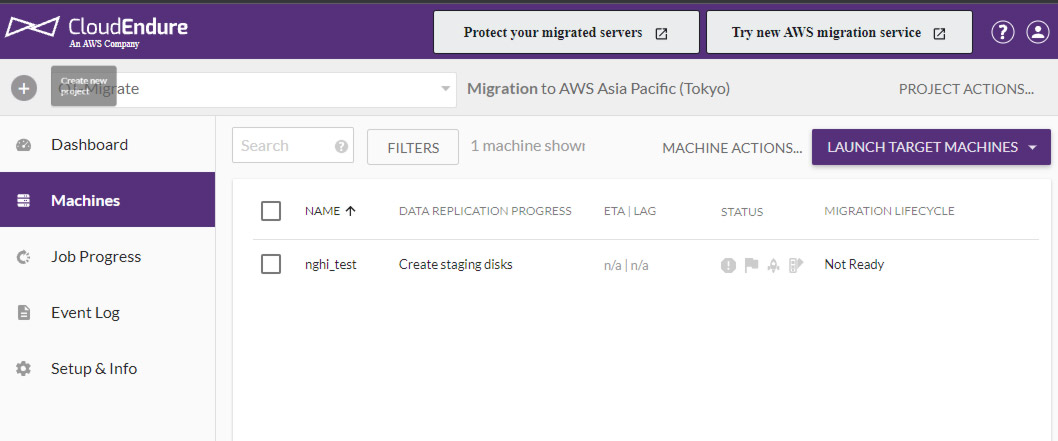
インストールが正常に完了すると、CloudEndure Machinesインターフェースに、転送されるサーバーの名前が表示されます。
AWSのEC2画面では、EC2CloudEndureが作成されたデータを転送するための中間サーバーであることも確認できます。

Step 7:CloudEndureのMachines画面にアクセスし、新しくインストールされたサーバーの名前をクリックします。
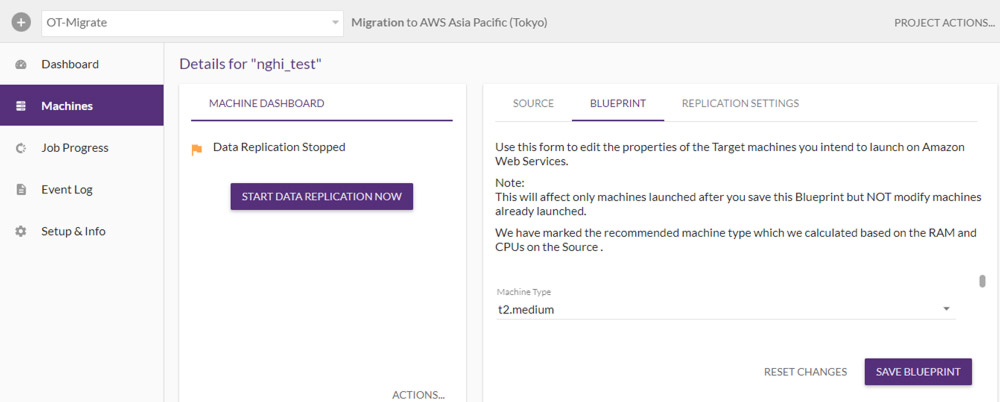
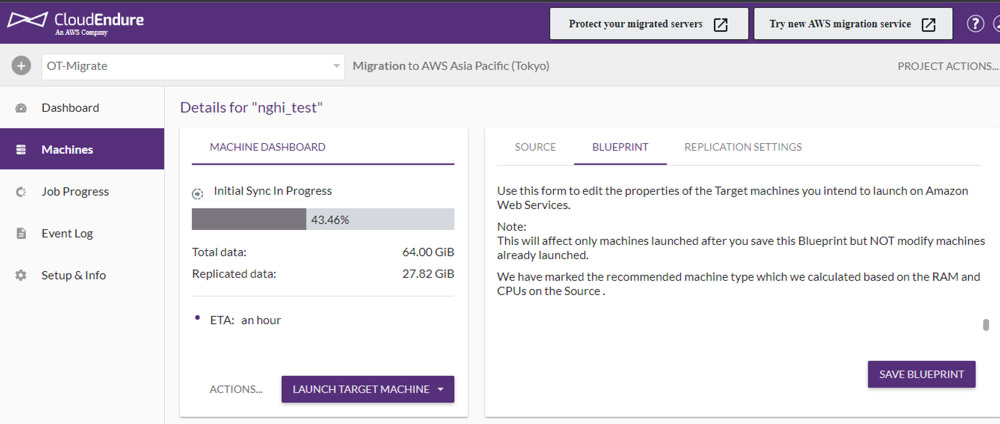
サーバーの[Details ]セクションで、[Blueprint ]タブに、サーバー構成が転送されてAWSに配置されることに注意します。このタブでは、タイプ、VPC、SSDタイプなどをカスタマイズできます。ただし、転送時の容量は古いサーバーのと同じであり、変更することはできません。構成を選択したら、[Save Blueprint]をクリックします。
・このラボでは、デフォルトのBlueprintパラメータを保持し、[Start Data Replication Now]を選択します。
データ転送プロセスを監視します。
転送が完了したら、[Launch Target Machine]-> [Cutover Mode]を選択して、転送されたデータで新しいEC2サーバーを作成します。
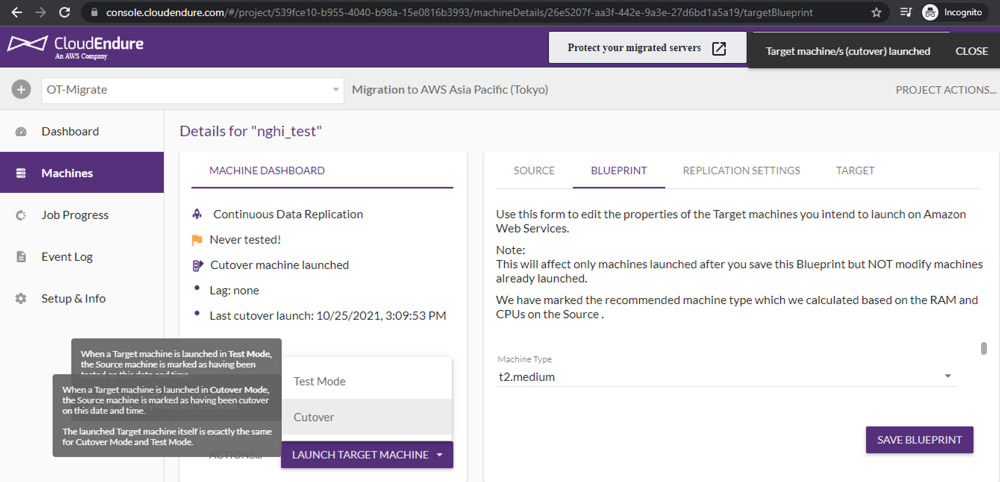
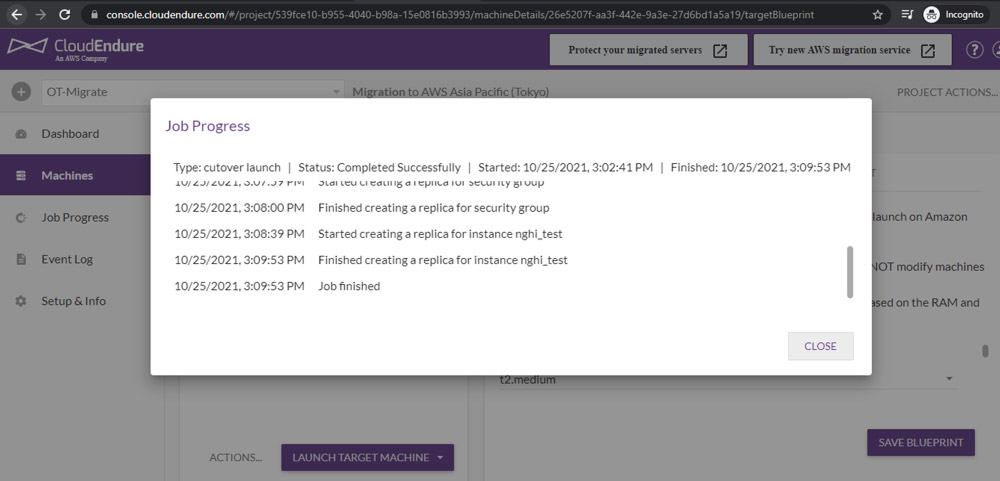
起動プロセス中に、[Job Progress]を選択して進行状況を追跡できます。
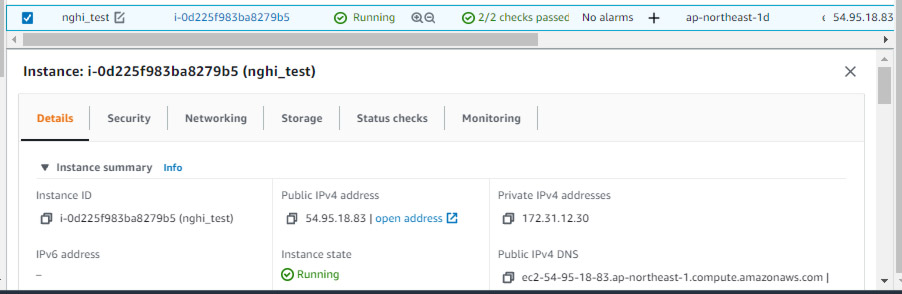
初期化が成功したら、AWSでEC2にアクセスしてデータを確認します。
サーバー資格情報は、古いサーバーのと同じになります。
データが十分に転送されたことを確認した後、AWS EC2画面でCloudEndureサーバー(データ転送用の中間サーバー)を終了します。
これで、インストールプロセスが完了し、CloudEndure中間サーバーサービスを介してサーバーをAWSクラウドに移行完了しました。
ONETECHのこの詳細なステップバイステップガイドが、サーバー移行プロセスを簡単かつ成功させるのに役立つでしょうか。
ONETECHはベトナムで、ソースコード変換、システムおよびサーバーのアップグレードを含むデジタルトランスフォーメーションサービスをサポートしています。 ご不明な点やご不明な点がございましたら、お気軽にお問い合わせください。 OneTechの経験豊富で熱心な技術チームがお手伝いします。
ベトナムオフショア開発会社 ONETECHは�PROT1�
もし、AWSについてプロのアドバイスが欲しいのなら、ぜひONETECHにご相談ください。
ONETECHはオフショア開発会社として100社以上との取引実績を誇ります。
ONETECHではAWS資格保有のエキスパートがお客様の課題をカタチにします。
- インターネットサービスの企画はあるがどうしたら良いか
- どのようにクラウドを利用したら良いかわからない
- クラウドを利用するためのコストやポイントを知りたい
- 保守運用まで考慮した設計をしたい
CloudEndureを含むAWSのコンサルティングサービスを提供しています。気になること、不安なことをお気軽にご相談ください。